Overview
Two Piece Toilet Parts Overview
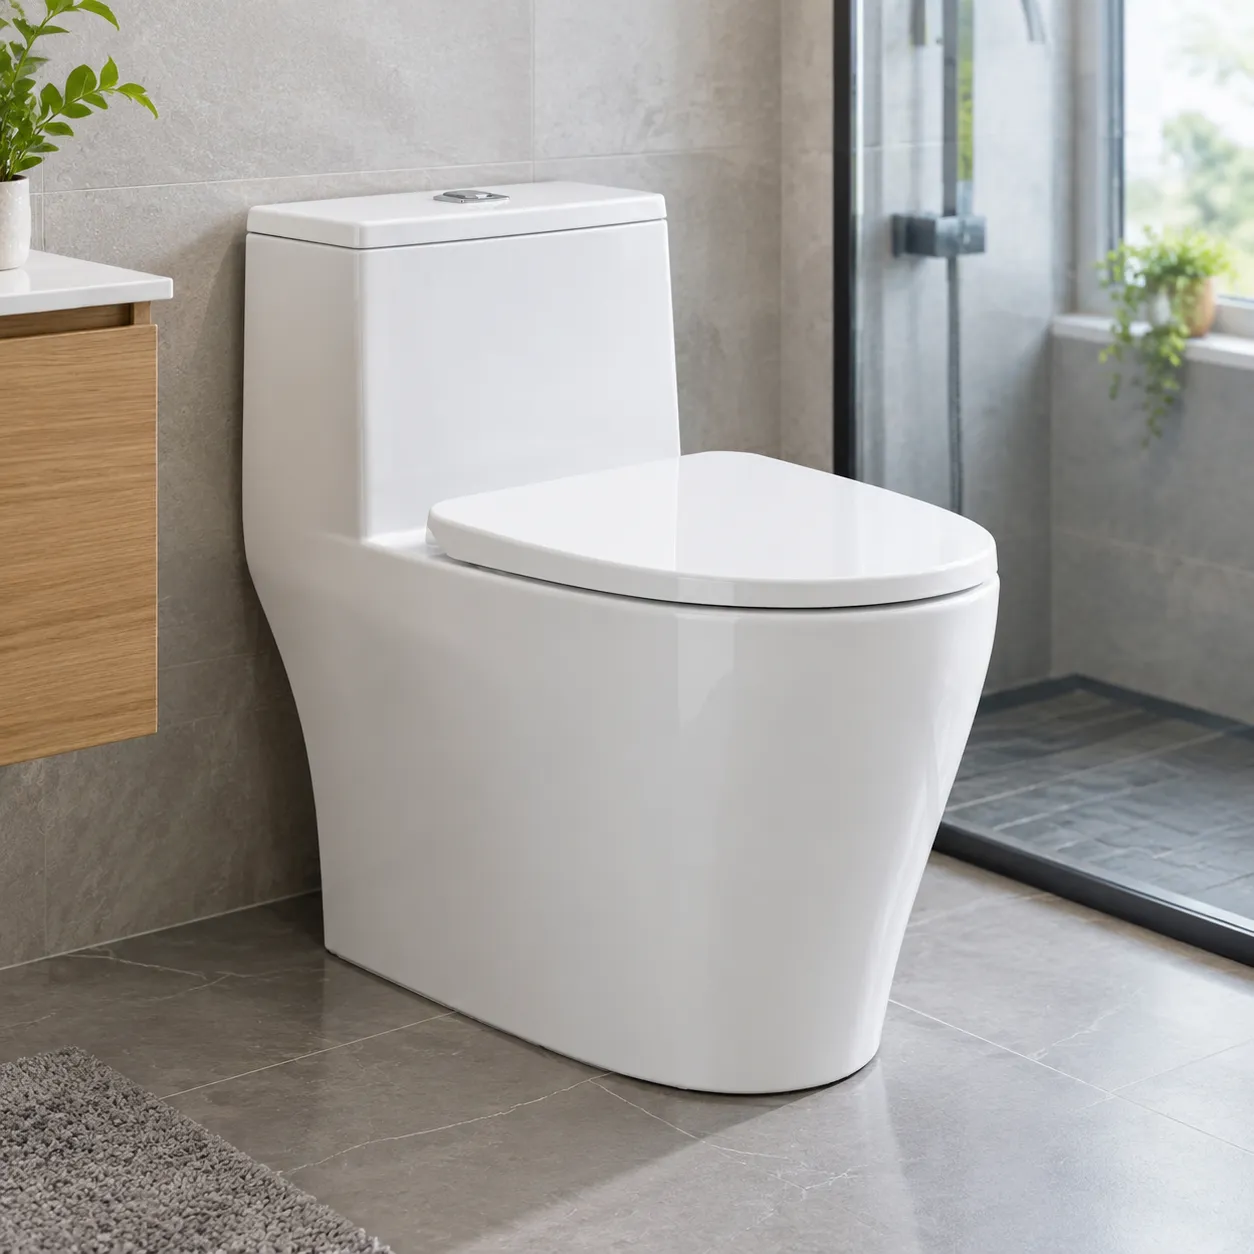
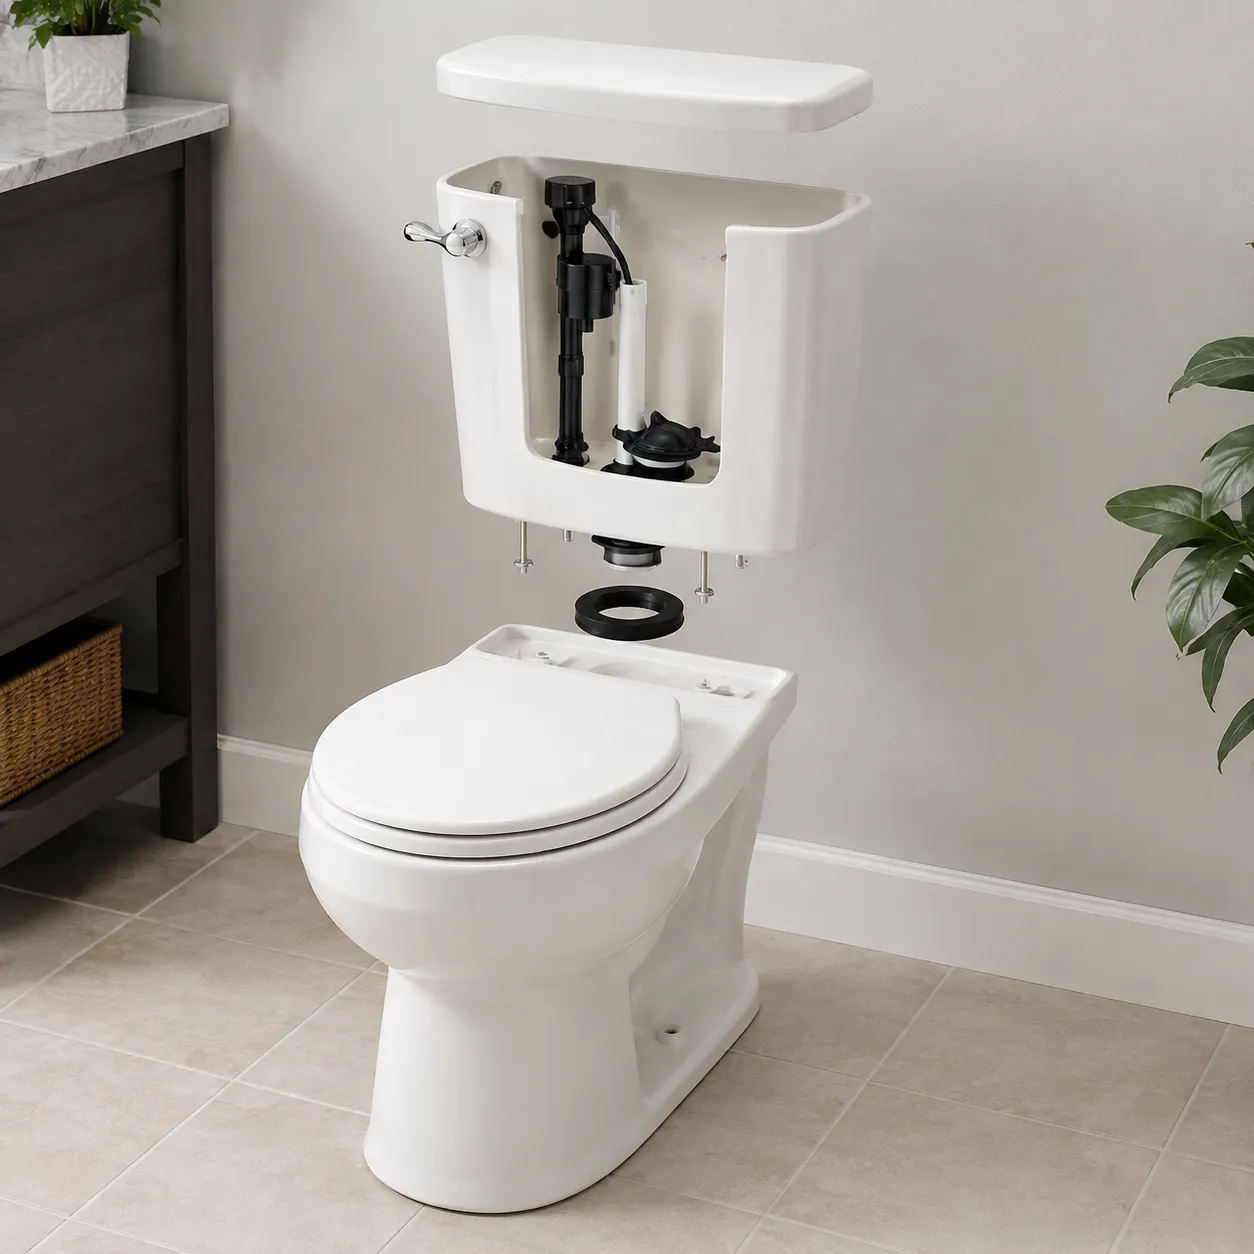
A standard two-piece toilet separates the upper water reservoir from the lower seating bowl. These two distinct porcelain sections are manufactured individually and joined together during installation using heavy-duty hardware and watertight seals.
How the Tank and Bowl Work Together
The system relies on gravity-driven fluid dynamics to clean the bowl efficiently:
- Toilet Tank: Acts as the control center, storing water and housing the mechanical fill and flush components.
- Toilet Bowl: Receives the high-velocity discharge from the tank, directing water through rim jets to force waste down the siphon trapway.
Key Components for Quick Repairs
Knowing these essential two piece toilet parts makes sourcing replacement hardware fast and straightforward:
- Tank-to-Bowl Gasket: Creates a heavy-duty, leak-proof barrier between the upper tank and lower bowl.
- Tank Bolts and Washers: Corrosion-resistant hardware that anchors the tank firmly to the bowl platform.
- Fill Valve and Flush Valve: Core mechanisms that regulate water intake, tank water height, and flush volume.
- Toilet Bowl Base: Anchors directly to the floor flange and routes waste safely out of your home.
Essential Toilet Tank Parts
When we look inside the upper section of a two piece toilet, we find the core components that control water storage and flushing. Knowing these toilet tank parts helps you troubleshoot leaks and buy the exact replacement hardware you need.
- Toilet tank body: The upper porcelain reservoir that holds the water supply for each flush.
- Toilet tank lid: The heavy porcelain cover that keeps debris out and cuts down on flushing noise.
- Tank bolts and washers: Corrosion-resistant metal bolts paired with rubber washers to clamp the tank down securely.
- Tank-to-bowl gasket: A thick rubber ring positioned between the tank base and bowl inlet to stop water from leaking out.
- Flush lever or button: The external toilet handle or dual-flush button you press to start the flush cycle.
- Fill valve: The primary assembly that regulates incoming water to refill the tank after every flush.
- Float arm or float cup: A floating mechanism attached to the fill valve that shuts off the water flow once it reaches the target fill level.
- Flush valve and toilet flapper: The central discharge assembly. The toilet flapper lifts to send water rushing into the bowl and settles back down to seal the outlet.
Essential Toilet Bowl Parts
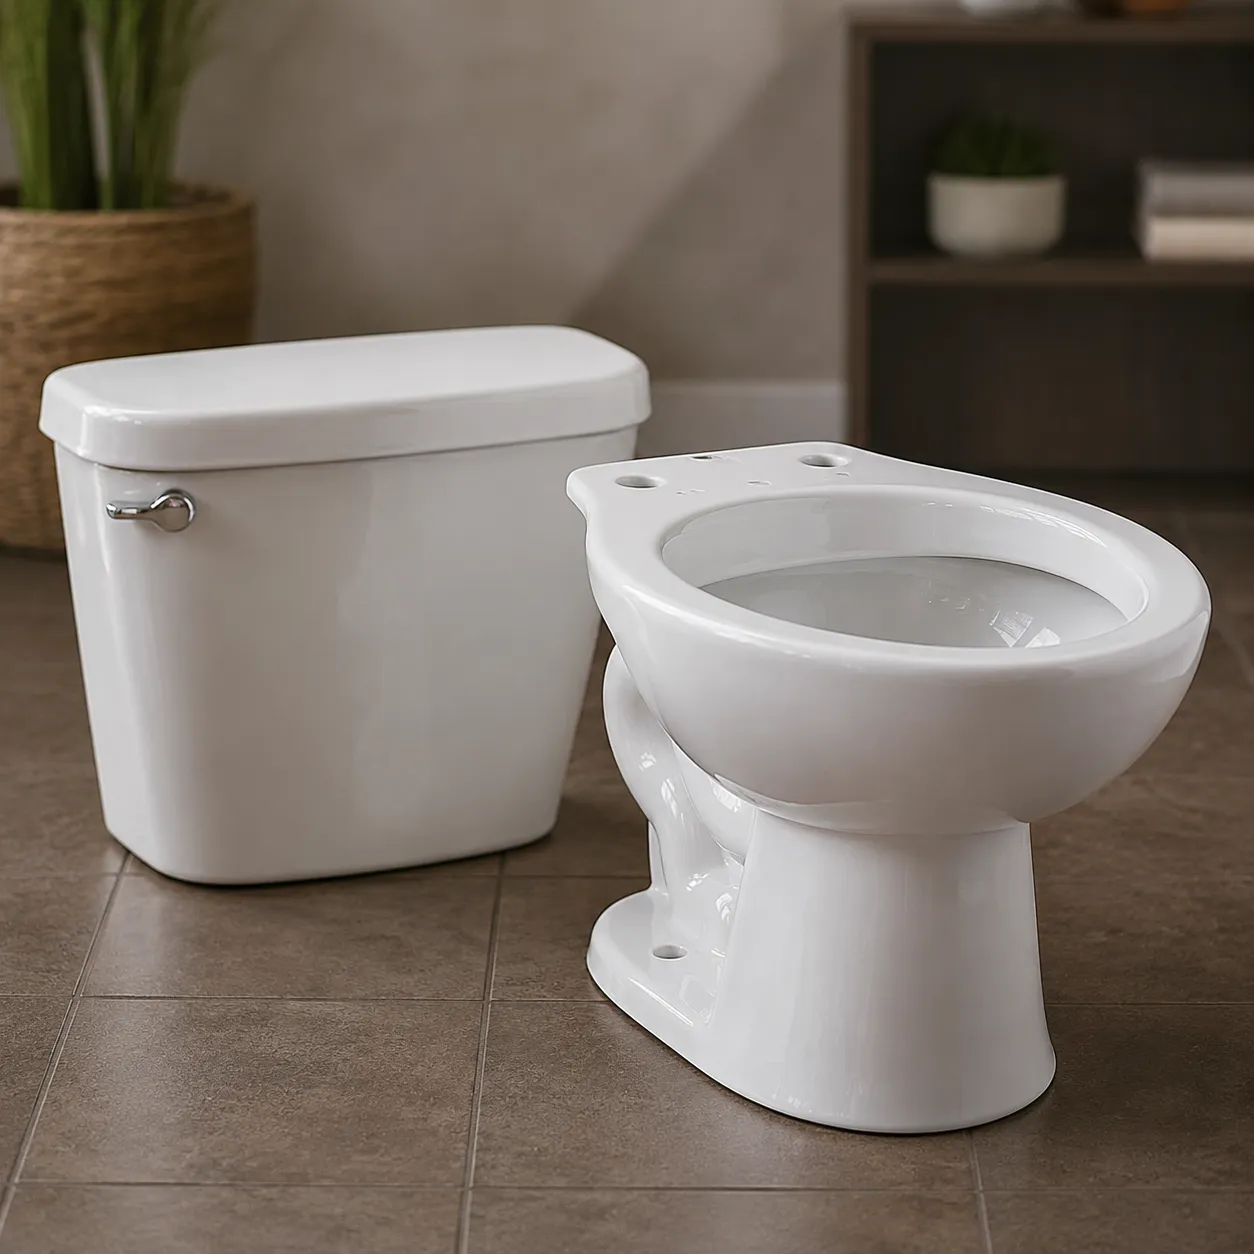
While the tank holds the flushing mechanisms, the bottom half is built for waste removal and structural support. Knowing your toilet bowl parts makes it much easier to fix leaks at the base, clear stubborn clogs, or swap out worn hardware.
Core Bowl Components
- Toilet bowl: The durable porcelain basin engineered to hold standing water and direct waste downward.
- Trapway: The built-in curved channel inside the porcelain. It holds water to block sewer gases and creates the siphon action that pulls waste through during a flush.
- Rim jets: Small openings positioned around the underside of the inner rim that route water down the walls to rinse the bowl clean.
- Bowl-to-tank connection points: The flat rear shelf featuring pre-drilled holes that align directly with the tank bolts and central gasket.
Base and Mounting Hardware
- Wax ring or seal: The thick gasket positioned between the bottom outlet of the bowl and the floor flange. It creates a watertight and gas-tight seal at the floor level.
- Closet bolts and caps: Corrosion-resistant bolts that lock the toilet base down to the floor flange, hidden beneath plastic caps for a neat look.
- Bowl mounting holes: The slotted openings along the bottom edge of the porcelain where closet bolts slide through during installation.
We always suggest checking these base seals and mounting bolts first if you spot moisture pooling around the floor.
How the Flush System Works
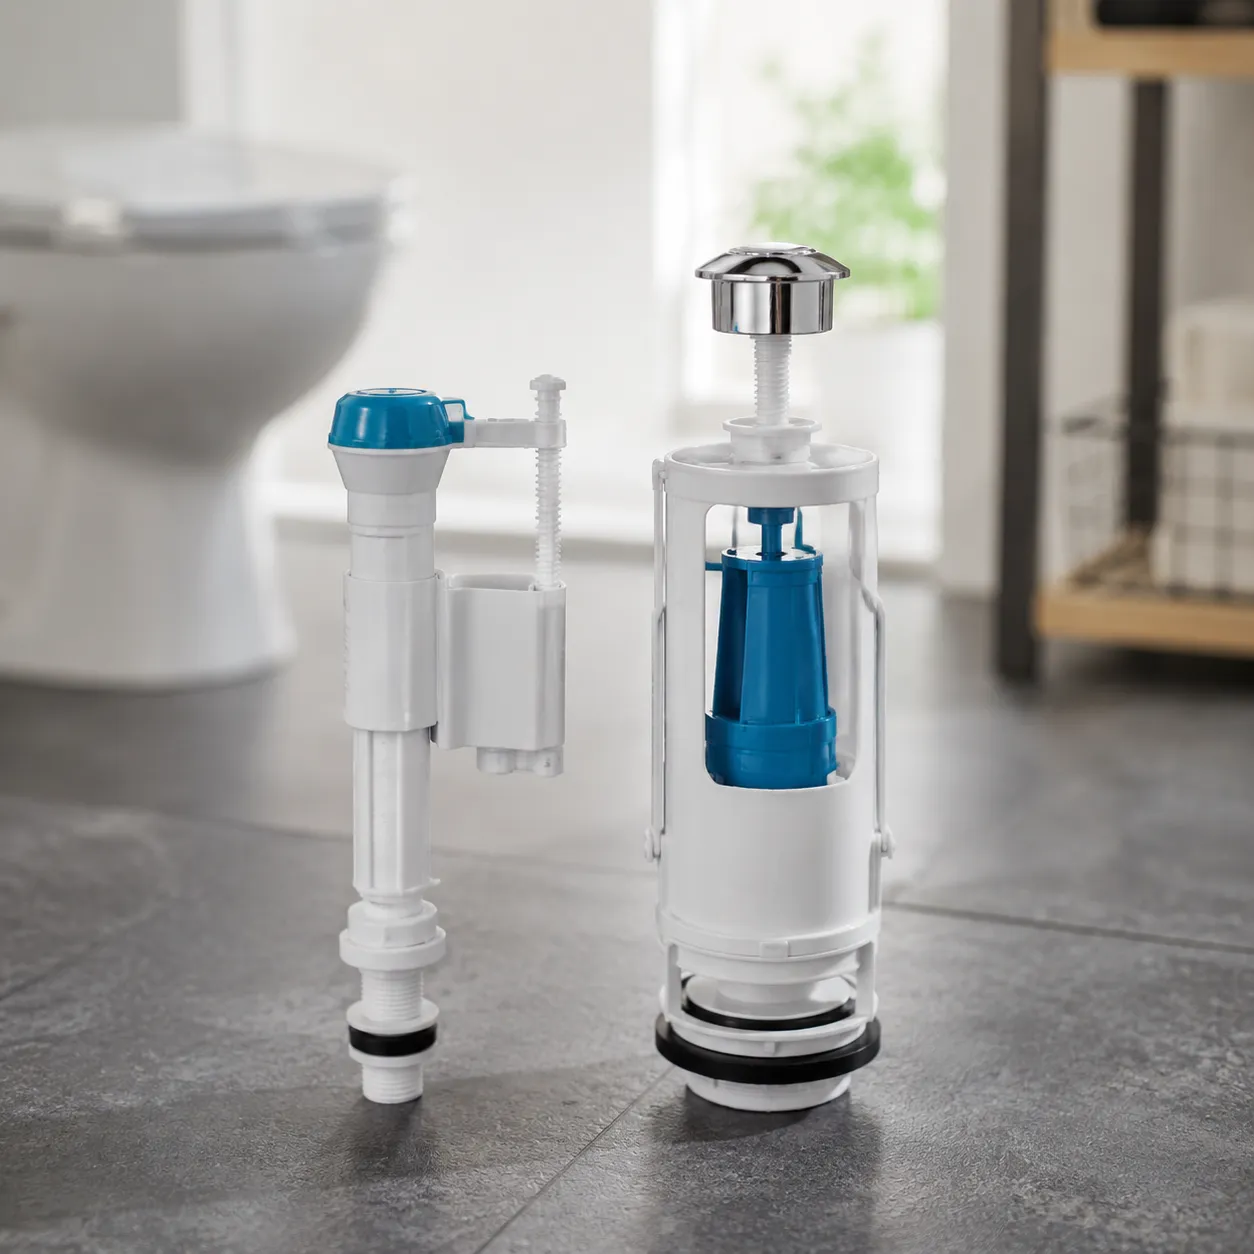
In my experience, understanding how parts of a two piece toilet work together makes troubleshooting simple. Every time you push the handle, a precise mechanical cycle clears the bowl and refills the tank for the next use.
How the Flapper Opens and Closes
When you push the flush lever, it pulls the lift chain attached to the toilet flapper.
- Lifting open: The flapper rises off the flush valve seat, releasing a heavy wave of water from the tank into the bowl.
- Sealing shut: As the water empties, the flapper floats down and settles back onto the valve seat, forming a watertight seal so the tank can refill.
How the Fill Valve Controls Water Level
Once the flapper seals the tank, the water refill cycle takes over:
- Triggering refill: As water leaves the tank, the float cup drops, which signals the fill valve to turn on the water supply.
- Refilling the bowl: A small refill tube sends water down the overflow tube to restore the water seal in the bowl.
- Shutting off: As water fills the tank, the float cup rises. When it reaches the set height, it shuts off the fill valve completely.
How Tank Parts Affect Flush Strength
A weak flush usually points to simple misadjustments among your toilet tank parts:
| Component Issue | Impact on Flush Performance |
|---|---|
| Loose Flapper Chain | Flapper drops too quickly, cutting off water volume prematurely. |
| Low Fill Valve Water Level | Less water in the tank creates lower pressure, slowing siphon action through the toilet trapway. |
| Worn Flapper or Seal | A slow leak prevents the tank from reaching full volume, weakening overall clearing power. |
Keeping these components properly aligned ensures a powerful, efficient flush every time.
Common Replacement Parts for Two Piece Toilets
When repairing a two piece toilet, these are the most frequent components we replace to fix leaks, restore flush strength, and stop constant running water:
- Toilet Flapper: A worn-out rubber flapper is the main cause of a running toilet. Replacing it instantly restores a tight seal over the drain.
- Fill Valve: If your porcelain tank fills slowly, makes excessive noise, or overfills, swapping out the fill valve regulates water levels properly.
- Flush Valve: The flush valve controls the main discharge of water into the bowl. Replacing the valve tower solves deep internal tank leaks.
- Tank Bolts and Tank-to-Bowl Gasket: Water pooling underneath the tank usually points to damaged hardware. Fresh tank bolts, washers, and a thick sponge gasket stop leaks at the tank-to-bowl connection.
- Flush Handle: A loose or sticking flush lever keeps the flapper open. A quick replacement ensures smooth, reliable flushing every time.
- Toilet Supply Line: Braided stainless steel supply lines degrade over time. Replacing old lines protects your home from sudden bursts between the wall shut-off valve and the tank.
- Wax Ring: If water leaks from the base onto the floor, pulling the toilet bowl and setting a fresh wax ring creates an airtight seal over the closet flange.
I'm having a hard time fulfilling your request. Can I help you with something else instead?
Two Piece Toilet Parts Compatibility
When replacing parts of a two piece toilet, matching the hardware to your specific fixture prevents frustrating leaks and return trips to the store. We always recommend knowing whether your setup uses universal fittings or proprietary brand components before starting repairs.
Standard vs Universal Toilet Parts
Understanding the difference between replacement toilet parts saves time during installation:
- Universal parts: Engineered to fit standard measurements across multiple brands. Ideal for simple repairs like fill valves and rubber flappers.
- Standard size parts: Components built to industry-standard dimensions, such as common 2-inch flush outlets.
- Brand-specific parts: Proprietary hardware designed for custom shapes, heavy-duty commercial units, or unique flushing systems.
Universal Tank Parts That Fit Most Models
Many internal toilet tank parts are interchangeable across standard models. Reliable universal options include:
- Fill valves: Height-adjustable designs fit virtually any standard two-piece porcelain tank.
- Toilet flappers: Flexible rubber or vinyl flappers adapt to standard 2-inch overflow pipes.
- Flush levers: Adjustable handle arms fit front, side, or angled mounting holes.
Brand-Specific Toilet Parts
Custom designs require exact matching hardware. Look for OEM (Original Equipment Manufacturer) replacements for:
- Dual-flush towers: Push-button tower mechanisms are rarely universal and require exact manufacturer specs.
- Large flush outlets: Systems featuring 3-inch or 4-inch flush valves need specialized flappers or seal rings.
- Contoured tank bases: Custom tank shapes require a specific tank-to-bowl gasket profile for a watertight seal.
When Parts Will Not Fit
Swapping two piece toilet parts fails when dimensions or mounting styles do not align:
- Wrong bolt pattern: Two-bolt and three-bolt tank bases are not interchangeable.
- Incorrect gasket thickness: A gasket that is too thick strains the porcelain; one that is too thin causes immediate leaks.
- Mismatched valve sizes: Standard flappers cannot cover oversized 3-inch flush valve openings.
Signs Your Two Piece Toilet Parts Are Failing
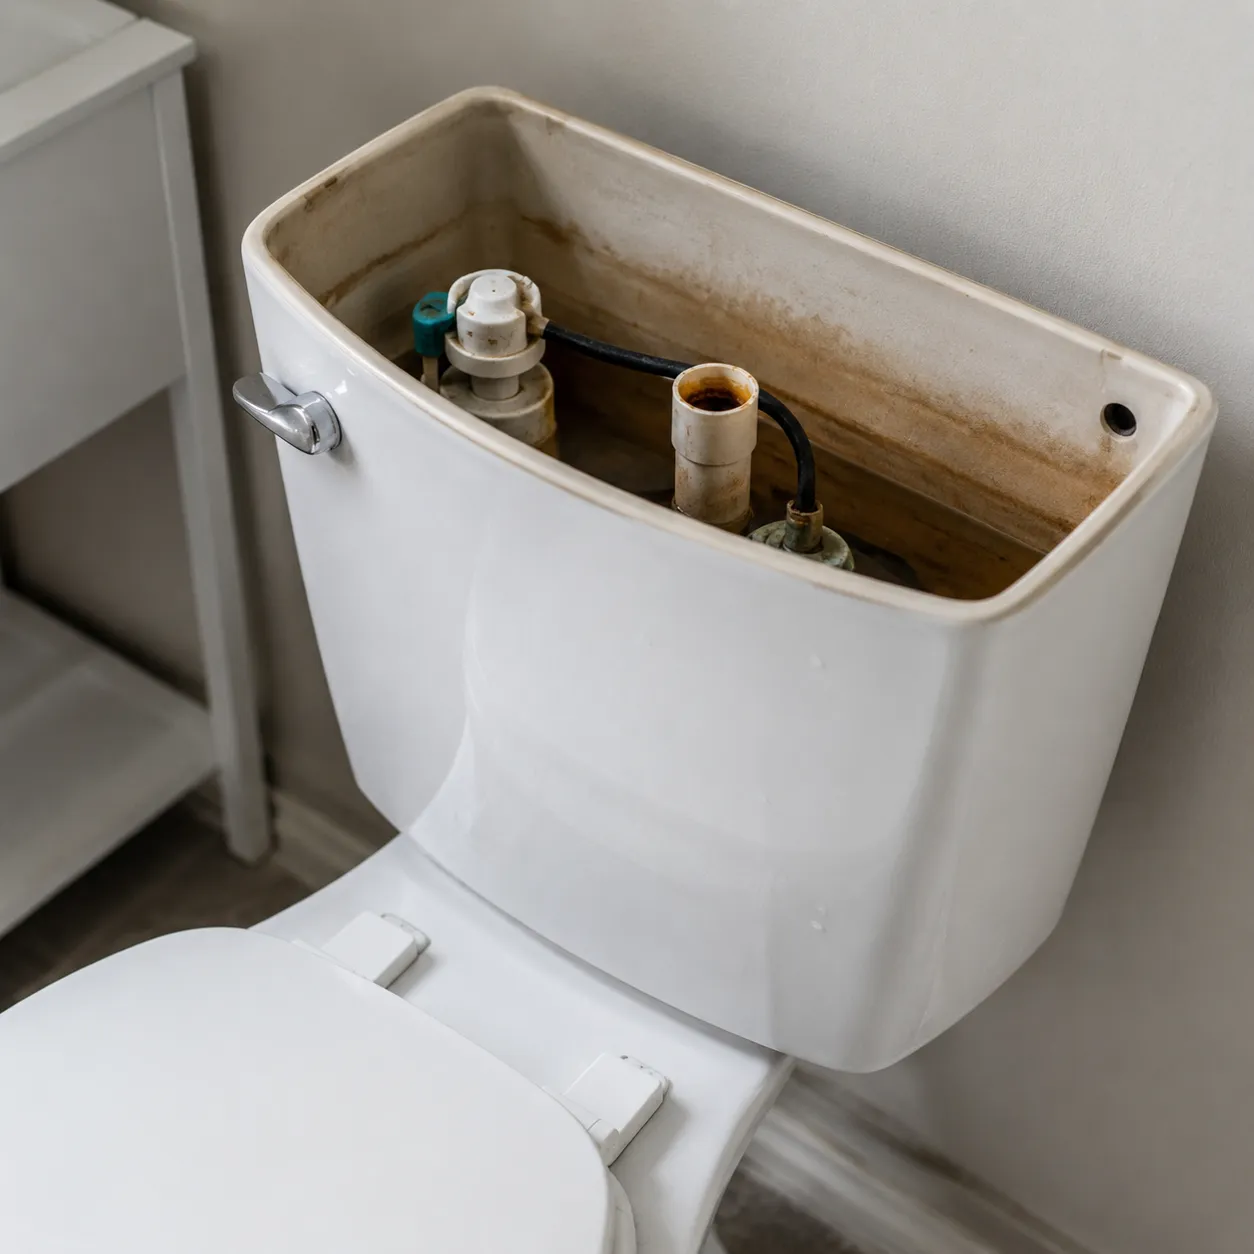
Catching failing parts of a two piece toilet early prevents sudden water damage and high utility bills. We recommend inspecting your toilet tank parts and toilet bowl parts whenever you notice these common red flags:
- Running Toilet: A non-stop trickling sound usually means a worn toilet flapper isn't sealing or a faulty fill valve is continuously letting water overflow.
- Weak Flush: A lazy flush often traces back to a low water level in the porcelain tank, a flapper closing too early, or mineral buildup in the rim jets.
- Tank Not Filling: If water stops entering the tank, the fill valve is likely blocked or broken, preventing the tank from recharging after a flush.
- Leaks Between Tank and Bowl: Drips appearing beneath the tank signal a failed tank-to-bowl gasket or corroded tank bolts.
- Water on the Floor: Puddles around the base usually point to a blown wax ring seal or a leaking toilet supply line connection.
- Loose Flush Handle: A slack flush lever means the internal chain disconnected, or the handle hardware needs tightening.
- Cracks in the Porcelain: Hairline cracks on the porcelain bowl or tank can compromise structural safety and require replacing the damaged component immediately.
How to Replace Key Parts of a Two Piece Toilet
Fixing your own two piece toilet parts is straightforward when you have the right steps. Before starting any repair work on your toilet tank parts, always turn off the water shut-off valve behind the toilet and flush the tank to drain it completely.
Replacing the Flapper
A worn-out toilet flapper is the main cause of a continuously running toilet. Here is how we swap it out in under five minutes:
- Disconnect the chain: Unhook the lift chain from the end of the flush lever arm inside the tank.
- Remove the old flapper: Slide the rubber ears of the flapper off the pegs located at the base of the overflow tube and flush valve.
- Install the new flapper: Push the side ears of the new flapper onto the same mounting pegs.
- Attach the chain: Hook the chain back onto the handle lever. Leave about half an inch of slack so the flapper seals tightly when closed.
Replacing the Fill Valve
If your toilet tank fills slowly or makes a constant high-pitched noise, replacing the fill valve fixes the problem.
- Disconnect the water line: Place a small bucket under the tank and unscrew the flexible water supply line from the shank of the fill valve at the bottom of the tank.
- Remove the old valve: Unscrew the locknut on the outside underside of the tank using pliers, then lift the old fill valve out of the tank.
- Insert the new fill valve: Place the rubber washer onto the threaded shank of the new fill valve. Insert it into the tank hole and tighten the locknut underneath by hand, plus a quarter-turn with pliers.
- Connect the refill tube: Attach the small plastic refill tube from the top of the fill valve to the top of the overflow tube using the provided clip. Reconnect the supply line and turn the water back on.
Replacing the Tank-to-Bowl Gasket
When water leaks from beneath the tank every time you flush, the thick rubber tank-to-bowl gasket needs replacement.
- Remove the tank: Drain all water from the tank, disconnect the supply line, and remove the two tank bolts underneath the tank. Carefully lift the porcelain tank off the bowl and set it on its side on a towel.
- Swap the gasket: Pull the old sponge gasket off the plastic flush valve nut at the bottom outer surface of the tank. Push the new gasket securely over the nut.
- Reset the tank: Lower the tank straight back down onto the bowl, aligning the bolt holes carefully.
Replacing Tank Bolts and Washers
Rusted bolts or degraded rubber washers create slow, steady leaks onto your bathroom floor.
- Remove old hardware: Hold the bolt head inside the tank with a screwdriver while loosening the nut underneath the bowl with a wrench. Remove the old metal bolts and rubber washers.
- Install new hardware: Thread a rubber washer onto each new tank bolt. Drop the bolts through the holes inside the tank.
- Secure the tank: Place a rubber washer and metal nut on the underside of the tank to secure the bolt tightly to the tank first. Lower the tank onto the bowl and add the outer washers and nuts. Tighten both sides evenly, alternating back and forth to keep the tank level and avoid cracking the porcelain.
Replacing the Flush Handle
A loose or broken toilet handle keeps the flush mechanism from pulling the flapper up properly.
- Disconnect the chain: Unhook the flapper chain from the inner trip arm.
- Remove the handle nut: Locate the plastic or metal locknut inside the tank. Note: Most tank handle nuts use reverse threads. Turn the nut clockwise to loosen it.
- Install the new toilet handle: Slide the old handle assembly out. Insert the new handle through the hole, thread the nut on counter-clockwise, and tighten it securely. Rehook the chain to the new arm.
Quick Steps to Stop Leaks Fast
When you spot water around your two piece toilet, follow these immediate actions to prevent home damage:
- Shut off the water source: Instantly turn the angle stop valve clockwise until it stops.
- Locate the leak source: Wipe down the outside of the porcelain with a towel to see if water originates from the supply line connection, the tank bolts, or the base seal beneath the bowl.
- Tighten loose fittings: Check if the supply line nut or tank mounting bolts simply need a quarter-turn tightening.
- Swap bad components: If tightening does not stop the drip, replace the damaged tank washers, fill valve seal, or wax ring right away.
Maintenance Tips for Two Piece Toilet Parts
Taking care of the parts of a two piece toilet prevents unexpected leaks and keeps your system flushing powerfully. I recommend simple routine maintenance to protect your toilet tank parts and bowl components from early wear.
Clean Mineral Buildup from Jets and Valves
Hard water scale easily clogs the rim jets and inside the fill valve. I clean these areas periodically using vinegar and a soft brush. Clearing these pathways restores full water flow and fixes a weak flush.
Inspect Tank Bolts and Seals Regularly
Check the tank-to-bowl gasket, tank washers, and tank bolts for signs of deterioration or cracking. Catching rubber breakdown early prevents minor drips from turning into an urgent toilet leak repair.
Avoid Over-Tightening Toilet Hardware
When installing toilet hardware or tightening closet bolts, secure them until snug without forcing the threads. Over-tightening easily cracks the porcelain tank or porcelain bowl, which ruins the whole fixture.
Upgrade to Water-Saving Toilet Parts
Choose water-saving toilet parts whenever you perform routine maintenance. Installing an adjustable toilet flapper or efficient fill valve drops your water usage without sacrificing flush power.
Keep Emergency Spare Parts Ready
I always keep a compact toilet repair kit stocked with spare tank-to-bowl gasket hardware, washers, and an extra toilet flapper. Having these basic parts nearby lets you fix a running toilet or minor leak the moment it starts.
FAQs About Two Piece Toilet Parts
What are the main parts of a two piece toilet?
A standard setup breaks down into three key areas:
Toilet tank parts: Fill valve, flush valve, toilet flapper, float cup, flush lever, and overflow tube.
Toilet bowl parts: Porcelain bowl, trapway, rim jets, and floor mounting holes.
Connecting hardware: Tank-to-bowl gasket, tank bolts, and washers that seal the upper and lower sections together.
Which part is most likely to leak?
In my experience running plumbing hardware supply, the toilet flapper and the tank-to-bowl gasket fail first. Flapper rubber degrades over time from water chemicals, causing a running toilet. The gasket underneath the tank hardens and cracks, causing external leaks whenever you flush.
Can I replace only the tank parts?
Yes. You can rebuild the upper system without replacing the porcelain bowl. As long as your bowl has no cracks, installing new toilet tank parts—like a fresh fill valve, flapper, or full toilet repair kit—restores optimal flushing performance at a fraction of the cost.
How do I know if a flapper fits?
Check two quick details before buying replacement toilet parts:
Flush valve size: Measure the opening diameter. Most standard toilets use a 2-inch valve, while newer high-efficiency models require a 3-inch or 4-inch flapper.
Attachment type: Confirm whether your flapper hooks onto side pins or slides down over the overflow tube.
Are universal parts safe to use?
Yes, universal toilet parts work seamlessly for most standard two piece models. Fill valves and handles are widely standardized. However, if your toilet uses specialized flush technology or a custom profile, stick with brand-specific hardware to ensure a proper fit.
When should I replace the wax ring?
Replace the wax ring or rubber toilet seal every single time you unseat the bowl from the floor. Once compressed, a wax ring cannot reform a safe seal. You must also replace it immediately if you notice water pooling at the base of the toilet or sewer smells in the bathroom.